
In our previous blog post, we briefly mentioned ways to validate data on your Resco form. This blog shows you how to validate your forms on Resco.
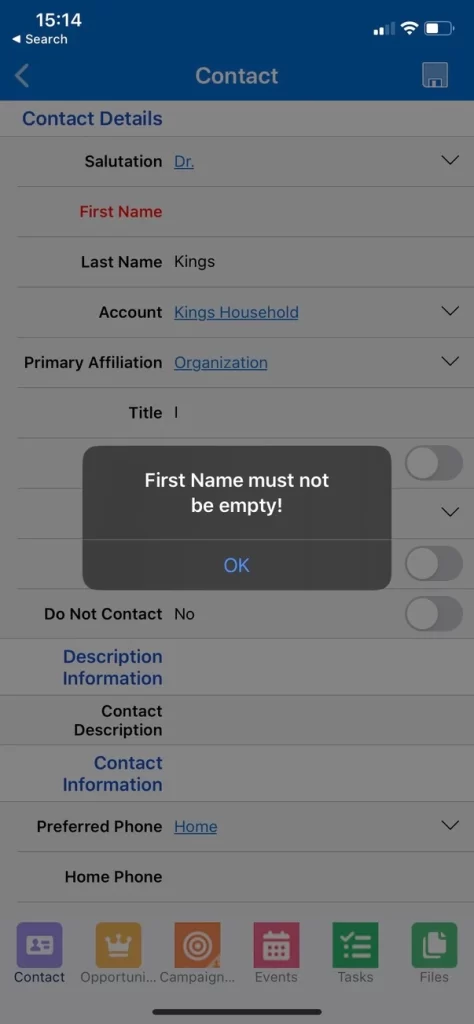
There are two types of validation – unconditional and conditional validations. Unconditional validation is enforced to ensure data completeness. For example, you may want to have certain compulsory information captured, such as the name field on a contact form. Whereas, conditional validation is enforced when a certain criteria is met. Let’s look at how you can create these.
Unconditional validation
Resco allows you to decide when you can apply rules or logical statements, such as OnLoad (when the screen is loaded, OnChange (when a value on the form is changed), or OnSave (when the record is saved). These events determine when the rules are applied. For unconditional validations, it is best to declare the rules in the OnLoad event. The declared rules in On Load section apply as soon as the form is loaded. Below is a step by step guide to declare an unconditional validation:
1. Navigate to the entity you want to apply validation to.
2. If you see a list of fields, click on Show UI
3. Select and the form you want to apply the validation on.
4. Navigate to the On Load rules.
5. Add a step by clicking on Step
6. Select “Form”.
7. Select the field you want to validate, e.g. “firstname”
8. Select assign.
9. Select True.
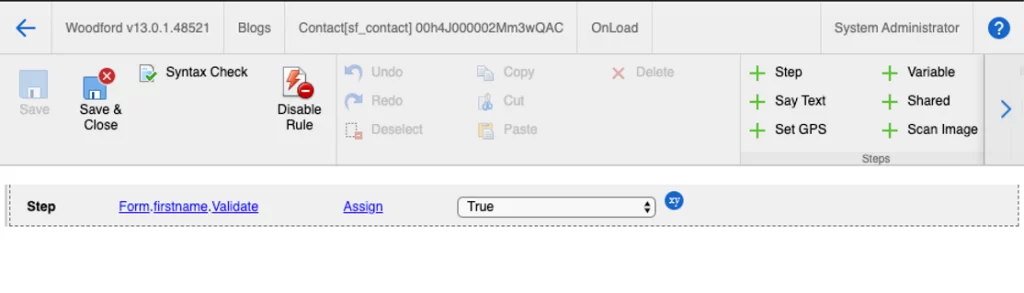
10. Click on Save & Close – this will take you to the form.
11. On the form, Click on Save & Close – this will take you to the entity’s main page.
12. Publish your project and refresh your app.
Conditional validation
On Change: these rules are applied when any field on the form is modified. They are also executed when you open a form. Typically, you would state the condition that must be met before enforcing a field validation, as shown in image below.
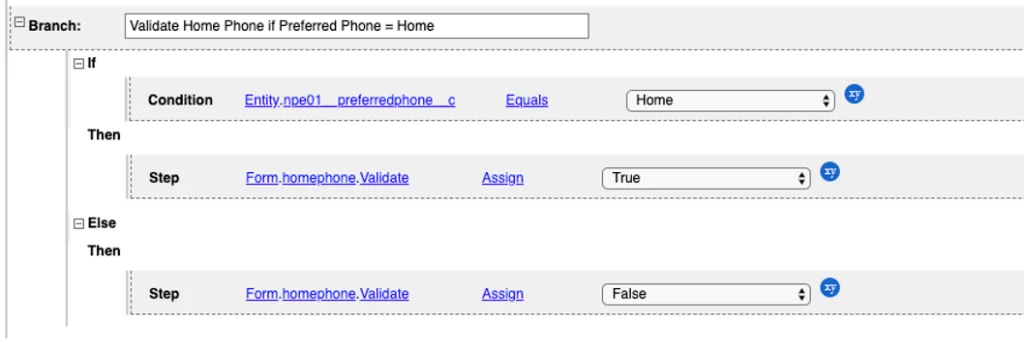
Follow these steps below to replicate what is shown in image above:
- Select and the form you want to apply the validation on.
- Navigate to the On Change rules.
- Click on If from the tools bar
- In the Condition, select Entity, and the field name
- Select operator and criteria
- Click on Then and add a step by clicking on the Step button
- Select Else from the tools bar.
- Click on Then and add a step by clicking on the Step button
- Select operator and criteria
- Save Rules
- Save Form.
- Publish.
Validate with your own error message
As shown below, if you want to display your own error message you can use the ErrorMessage option, instead of validate in the Step.
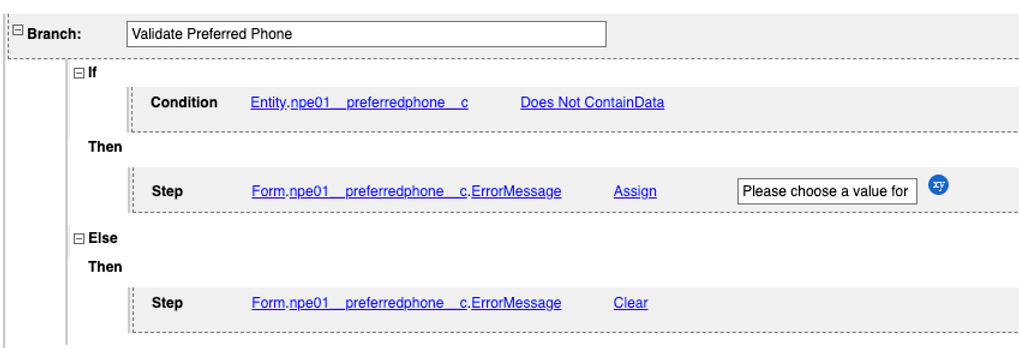
Also, if you wanted to ensure a field was populated you can use the “Does not contain data” check in a condition.